
- Import your Gaussian Splat file into TouchDesigner
Download TouchDesigner from: https://derivative.ca/download
The version I used is 2925.31310.

Get the TouchDesigner program file from: https://www.patreon.com/posts/gaussian-in-pops-141003831?utm_medium=clipboard_copy&utm_source=copyLink&utm_campaign=postshare_creator&utm_content=join_link
After opening the downloaded file, it should look like this:

Click the GaussianSplatPOP node to open the parameter panel on the right side.

Click the “+” button or drag and drop your ply file to the GaussianSplatPOP.
In order to make your Gaussian Splat file render properly in TouchDesigner, remember to check the headline of your ply file. Make sure it contains…
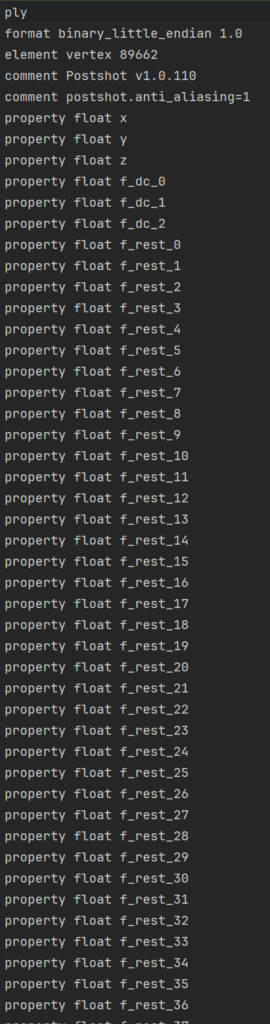
… rather than just

- Play with the splats

After the splats are rendered properly in TouchDesigner, we can use the Uniform scale to change the scale of the whole object.

And use the Splat size to change the size of each splat.

And use the Alpha threshold to change the alpha blend.

For further development, you need to be familiar with TouchDesigner’s POP system. I will link the tutorial I watched below. It contains some useful tricks when playing with the splats.
- Make splats react to the audio
TouchDesigner has a powerful function called AudioAnalysis, which can analyze the audio file and show the value of different frequencies. It can even recognize the rhythm and kick.
First, connect an “audio file in” node with an “audio dev out” node.

After importing the audio file, connect the “Audioanalysis” node to the “audio file in” node.

Adjust the threshold of the “audioAnalysis” node to get a larger range of data.
Use “select” node and “math” node to choose a certain channel you want to use and map the range to a proper range.


You can select a channel you want to use using this function, and you can see the value changing with the music.

The last thing you need to do is to use the audio value as a reference for the parameters of the nodes, which changes the splats (position, scale, color, noise, etc).

Play with different values and parameters to make your visual react better with the audio.
A more advanced tutorial:
- Export video with transparent background
Click the arrow icon of the “rgbKey” node to make the background transparent and add a “moviefileout” node at the end.

Make sure the setting of the “moviefileout” node looks like below:

Detailed tutorial can be found here:
Last Updated: 4/13/2026