Week 1 Rally up the team & kick off the project
In the first week, we met with our client to get the design prompt and tried to build up the collaboration system for both the internal and external teams.
For production:
We met the team to align with the expectation for project, individual expertises, perferred collaberation mode.
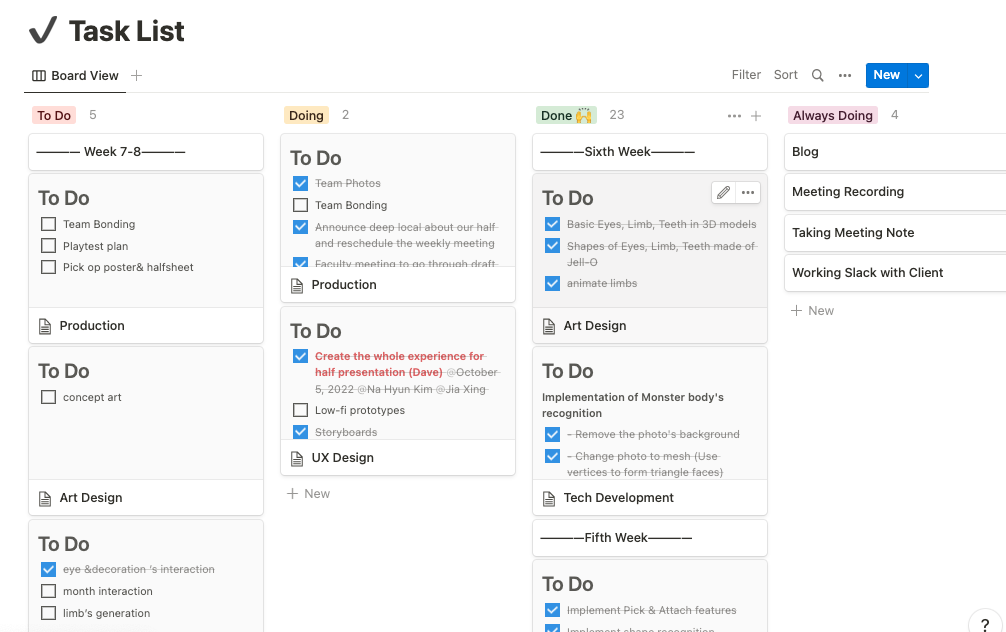
We settled on using Slack + Notion + Google suite to manage our projects.
For the projects:
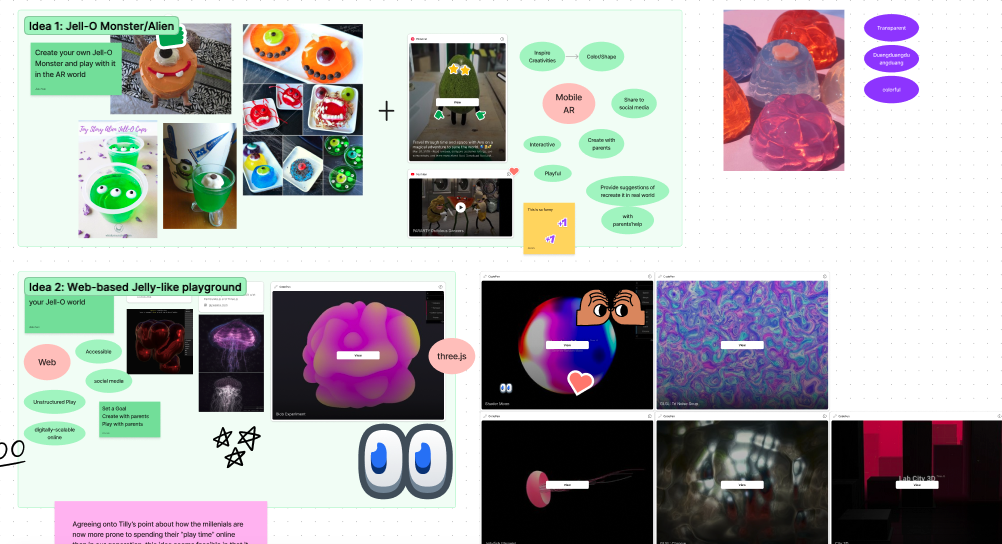
Regarding deeplocal’s working pipeline as a design agency, we brainstormed 12 ideas (2 idead/people) and created 12 one-liner pitch slides.
Week 2 Narrow down the ideas and pitch them to our client
In the second week, we met with our client to get feedback on our initial ideas. Also, we finalized our team collaboration system.
For production:
We set up our slack chanel with faculty and clients. We also finazlied the core hour, meetings with faculty and clients. We also set up our working tools like notion, google drive and Figma.

For the project:
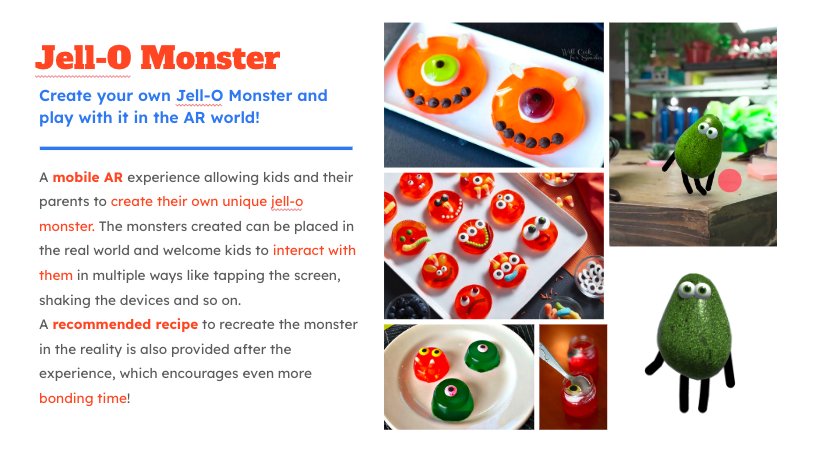
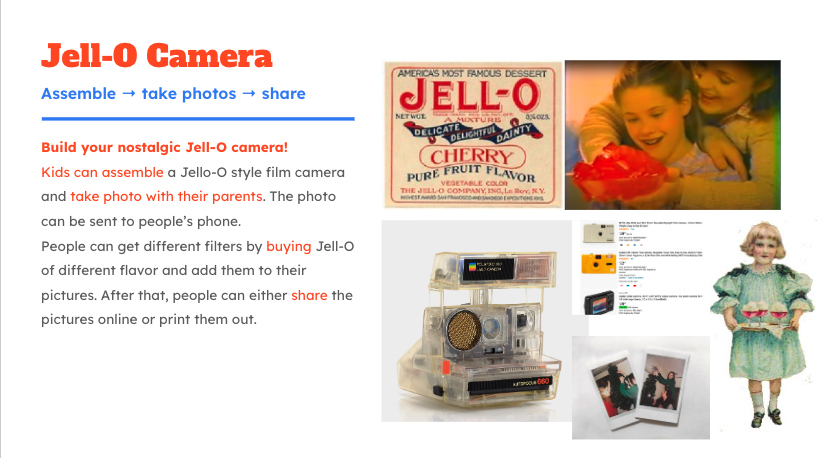
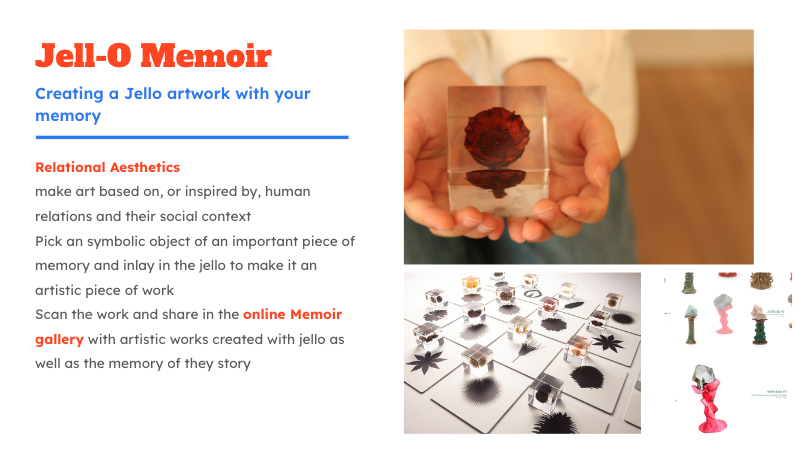
The clients picked 3 mian directions which they thought are most aligning with design goal and exciting which is Jell-O monster, Jell-O filter and Jell-O Memoir.
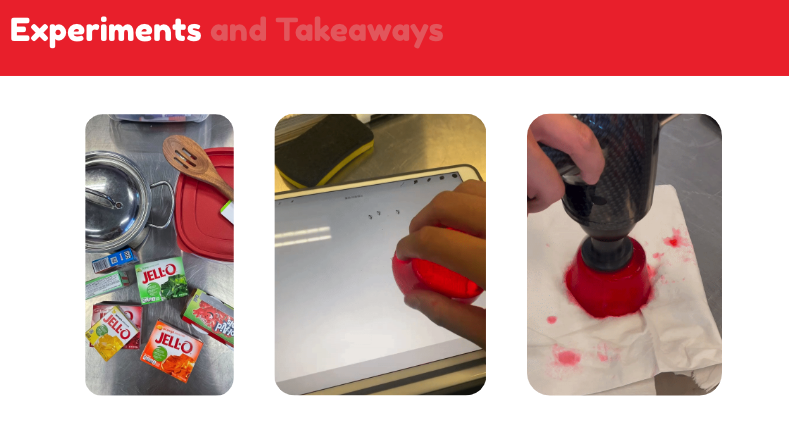
We also started to play aroudn with Jell-O, conducted some experiment to get more insights and inspiration.

Week 3 ETC quarter and get pushed back by our client
In the third week, we met with the ETC faculty to discuss our project progress and gather feedback. Also, we decided on the monster idea and pitched it to them. We failed to get buy-in which was miserable and sad.
For production:
We started to practice the collaberation mode we planed. Most of them went well. The only flaw was the daily scrum was really hard to conduct because the incompatibility of everyone’s schedule.
For the project:
After taking the feedback from the quarter, we directly went into the Jell-O monster idea without syncing it up with our clients. So when we pitched our refined idea to them, we unfortunately got push back.
For design:
We finished our team branding kit including poster, half-sheet and team photo.
Week 4 Honed our pitch and successfully sold our idea
In the 4th week, we put a lot of effort into honing our pitch. We learned how to tell the story and how to sell the idea. It was struggling this week, but we finally made it! The client was satisfied and cheered for your pitch.
For production:
We add an online scrum meeting on Tuesday and Thursday which suits everyone’s schdule which turned to work better.
Also, we reached into a consensus that we will consider the weekly update for clients as psurdo pitches to constantly improve our professional pitch skills.
For the project:
We organized what I had and shaped them into a compelling storyingtelling within 15 mins.
Week 5 Proof of concept and detailed user flow
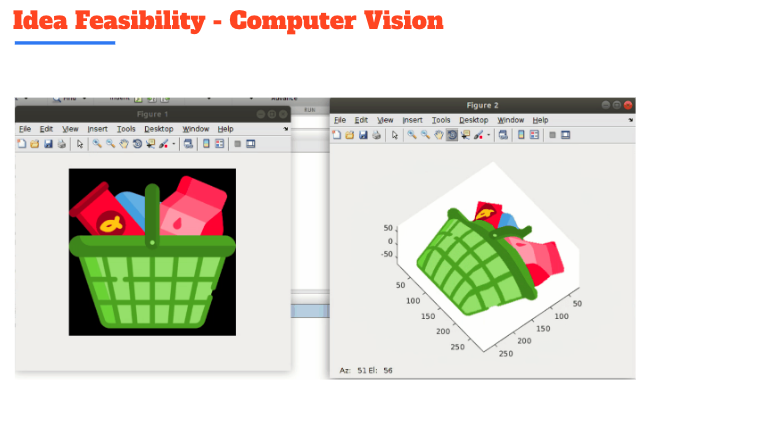
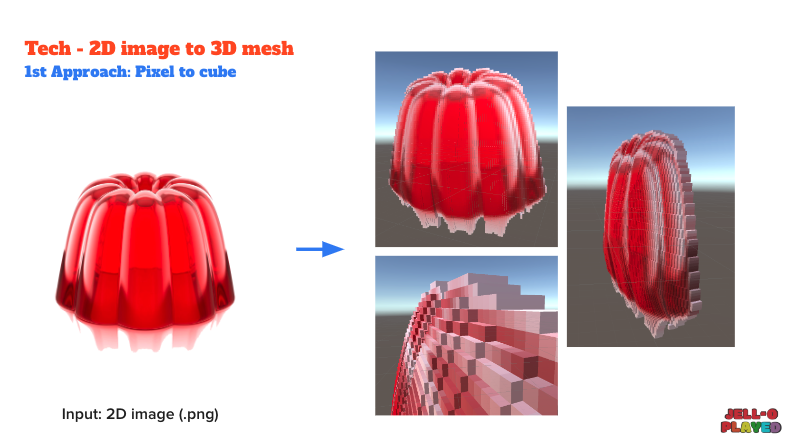
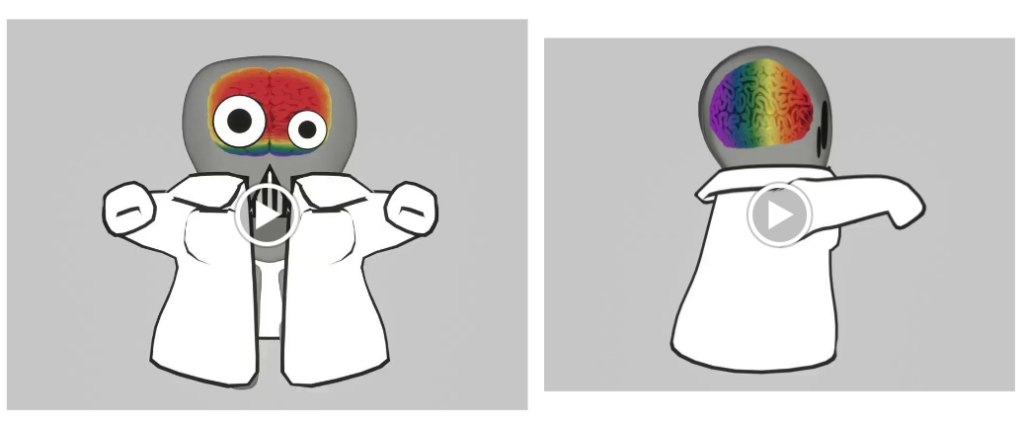
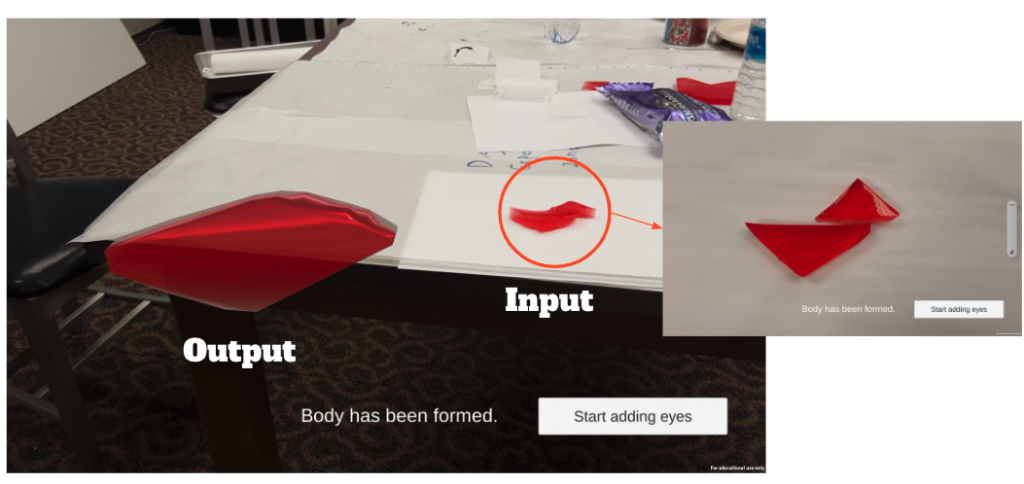
In the 5th week, we finished our proof of concept, which is the image recognization & polygon generation. Also, we came out with a more detailed user flow.
For tech:
Our programmer tried to implement the basic function of our design which is to transfer the real-world image into a virtual 3D subject.
For design:
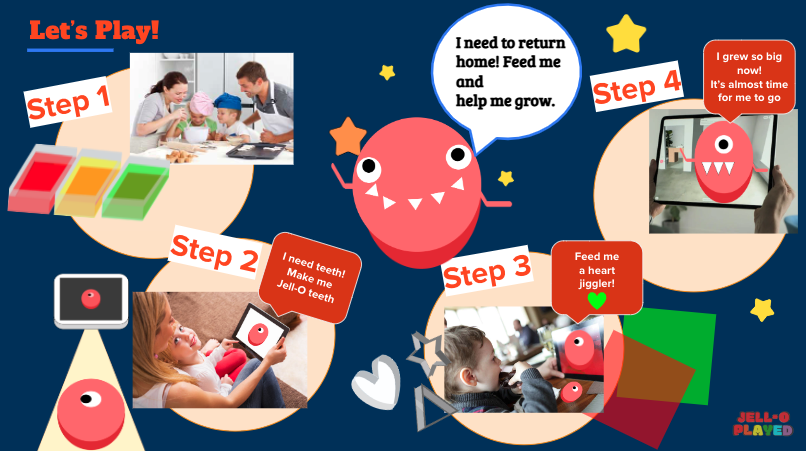
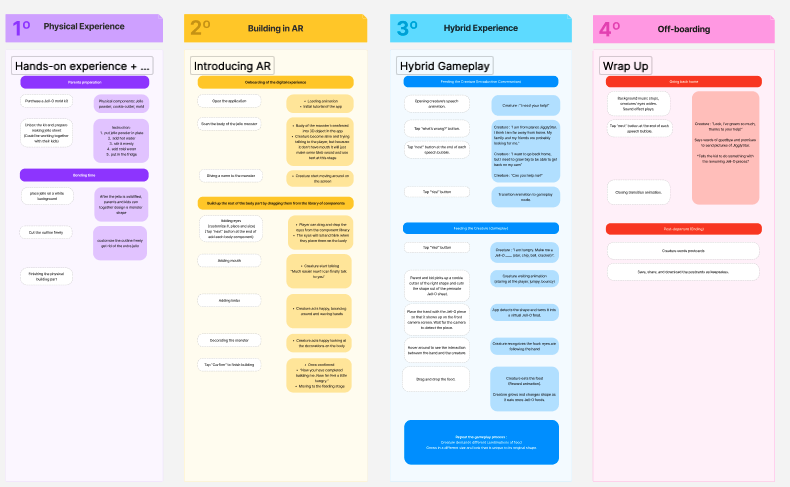
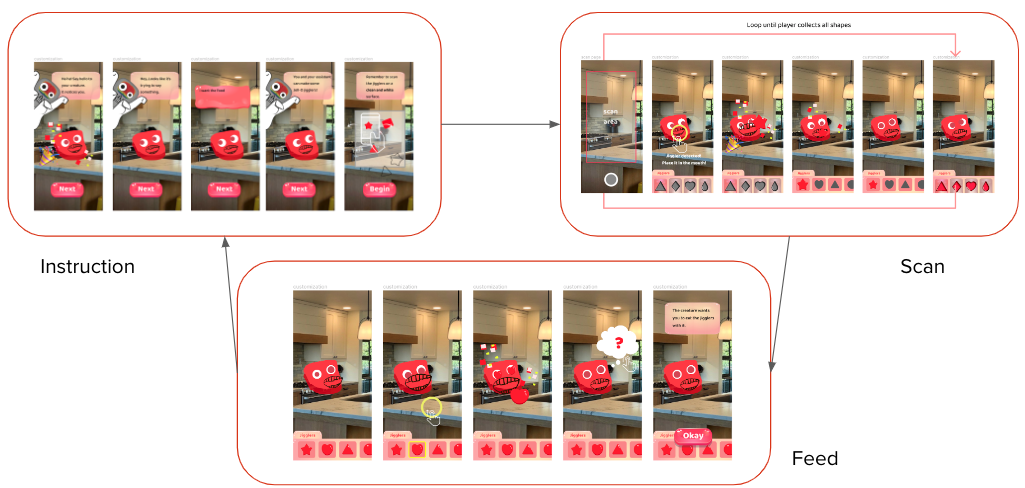
We came up with detialed user flow and beat sheet. The core of our experience is to create several magic moments including bringing the Jell-O monster to live, humanizing the monster and interacting with the monster
Week 6 Interaction loop and refined technical solution
In the 6th week, we came out with the core design loop of our experience, which is prompt -> action -> rewarding -> interaction. Also, we finished the technical solution validation for the whole process.
For design:
We met the team to align with the expectation for project, individual expertises, perferred collaberation mode.
We settled on using Slack + Notion + Google suite to manage our projects.


For tech:
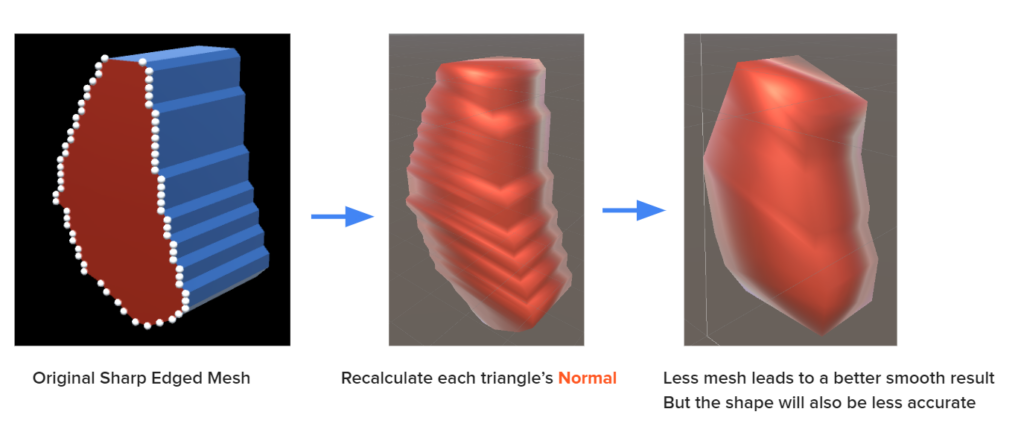
We iterated our technical solution for the image recognization and 2D-> 3D transformation, which makes the generated shape more accuracy.
Week 7 Half presentation & Fall break

Week 8 Tech demo for customization & ETC playtest day
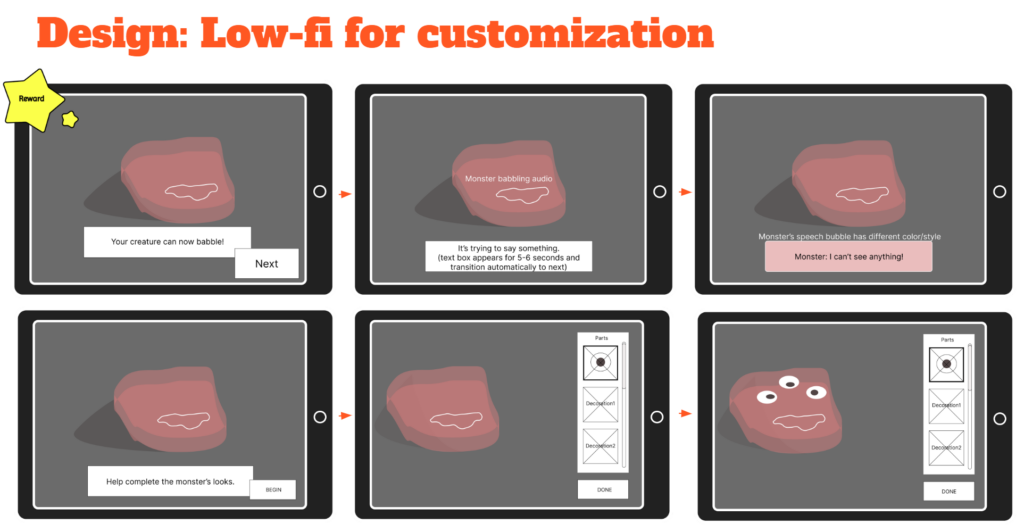
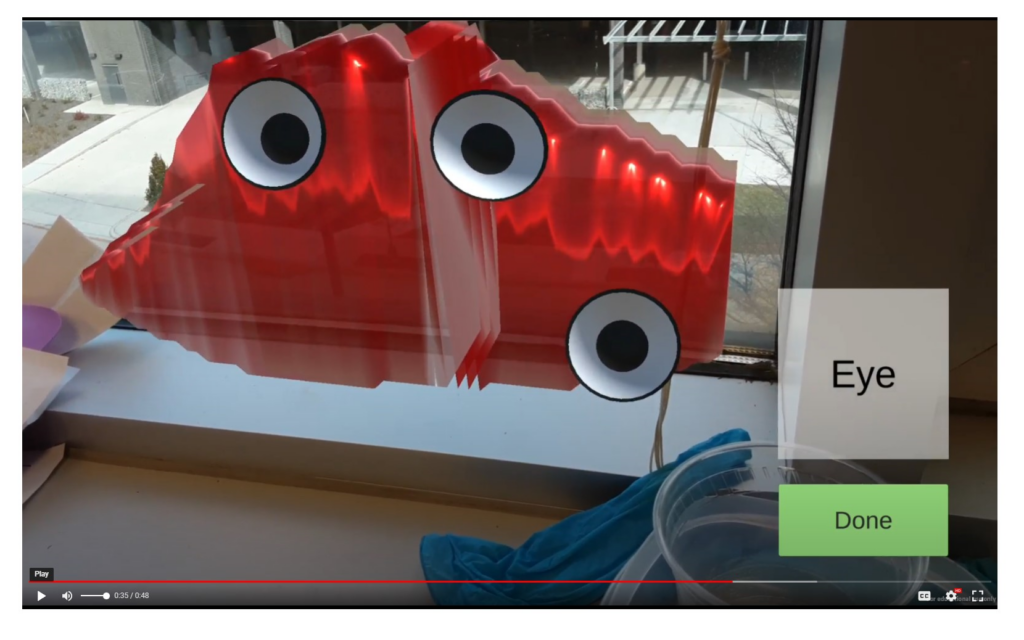
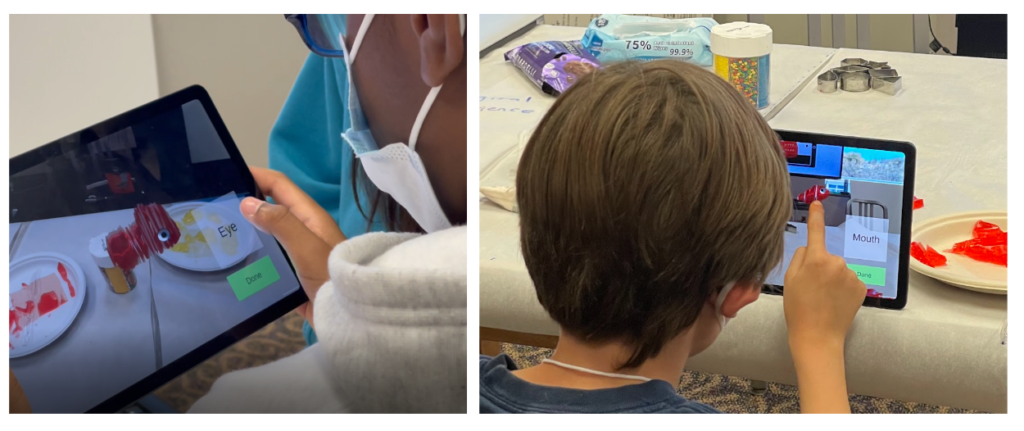
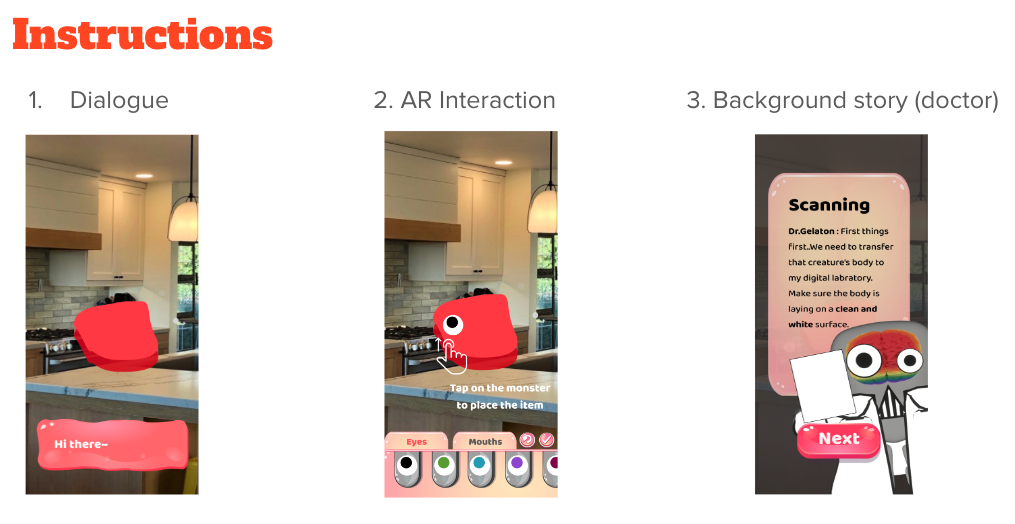
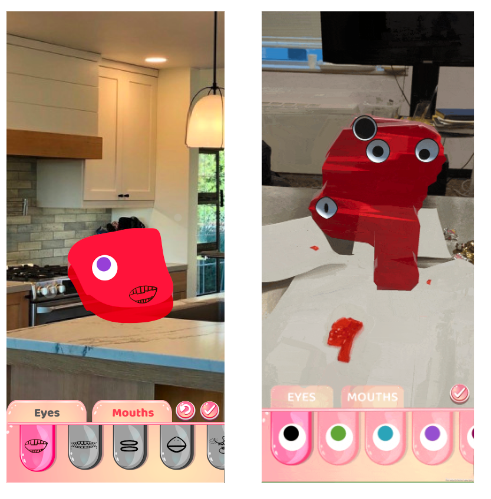
This week, we finished the basic demo for customization, which allowed users to drag and attach the eye & mouth to the body of Monster. Also, we tested our physical-making stage and demo with around 30 kids and kids.
For design:
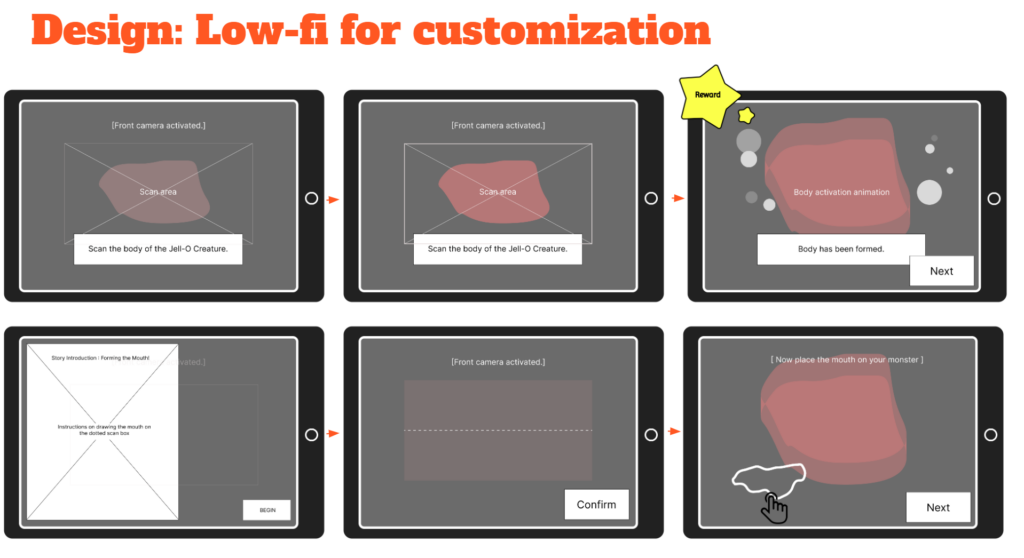
We created low-fi interfaces and user flow for custimization stage. There are two magic moments which are body generation and feedback after attachment of eye & mouth.
For tech:
We implemented the basic functionality of draging & attaching eyes. But its can not be attached on the body shaped if not operating in a front perspective.
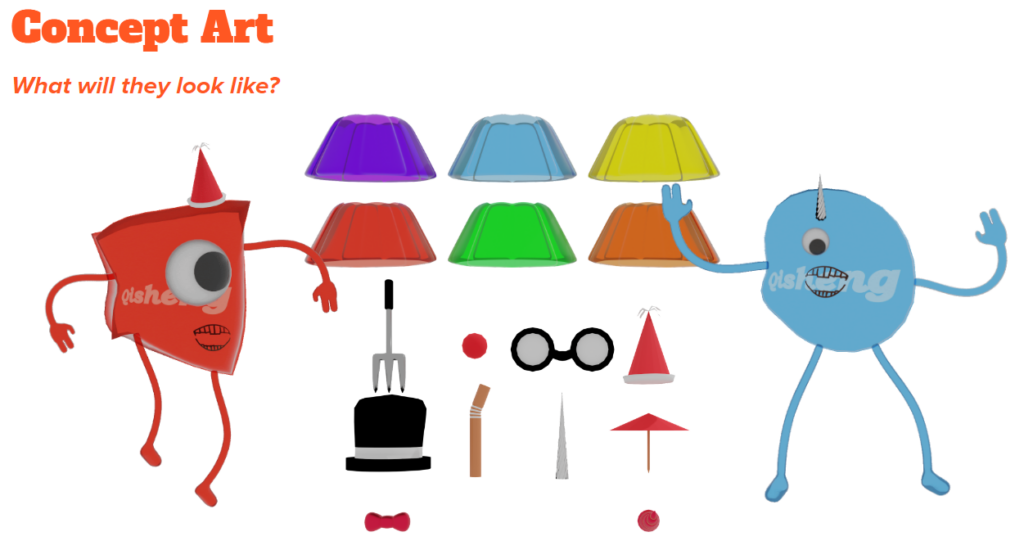
For art:
We designed our first version of concept art.
For playtest:
Here are top 3 feebacks from playtest:
1. Inaccurate and unstable monster body
2. It’s hard to drag and drop the eye, and mouth
3. Lack of instruction and feedback for eye and mouth
Week 9 Feeding stage test & narrative design
This week, we iterated our design based on the conclusions we got from ETC playtest.
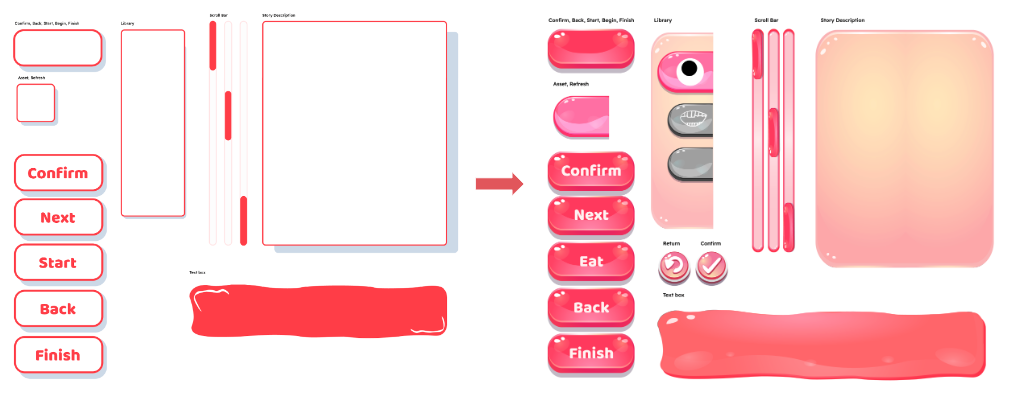
For design and art:
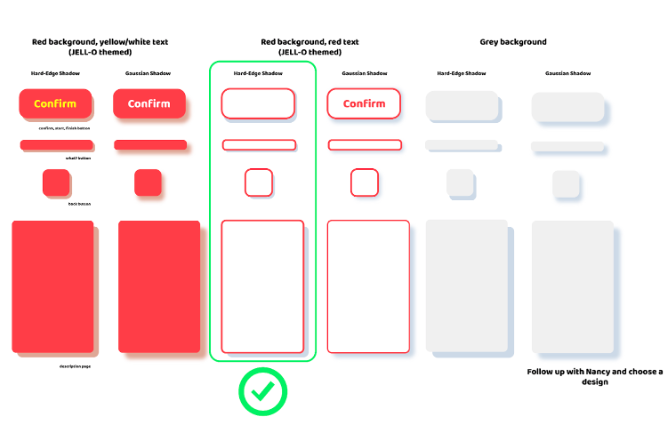
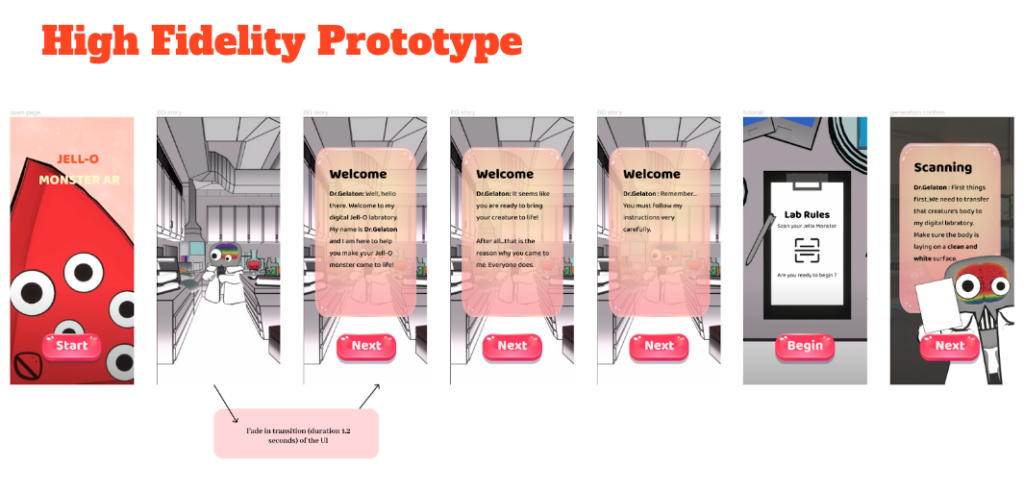
We designed the low-fi design system. Meanwhile, we polished our storyline and created the image of Dr.gelatin.
For tech:
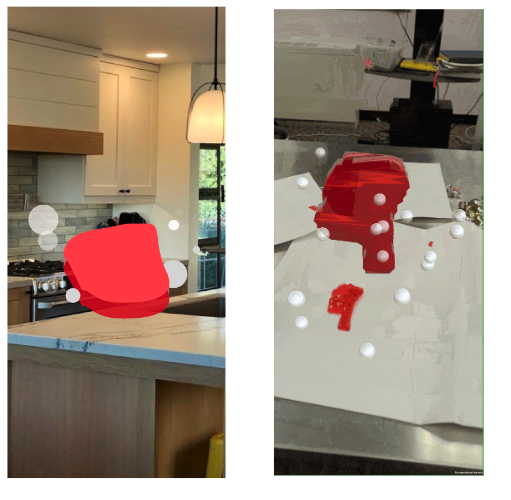
For the stability of the app, we tried to use the Convex Hull solution to decrease the possibility of a broken shape. It helps a lot with the completeness of shape. But the accuracy of shape recognition will be very low.
Week 10 Platform transmission & customization refinement
We changed our platform from iPad to phone. Because image recognition is more stable on the phone, it will be easier for kids to hold and play as well.
For design:
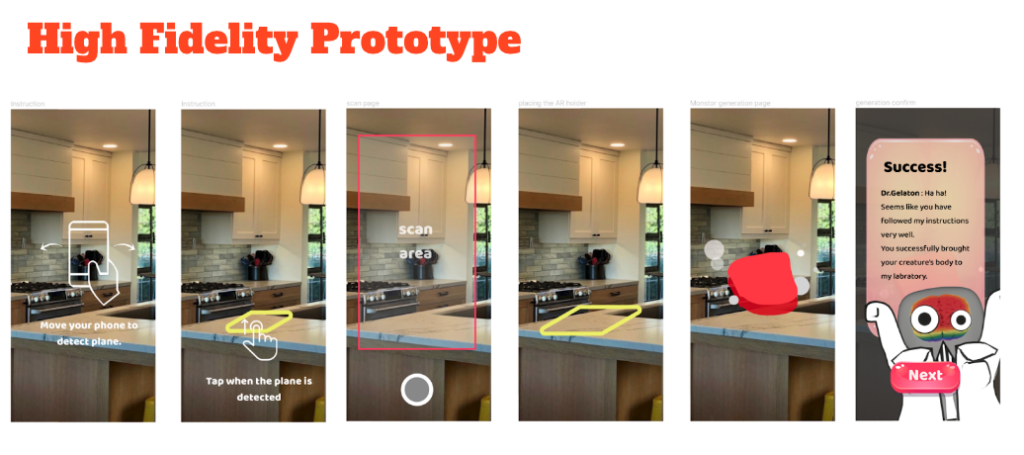
We iterated our design system and conducted the high-fi prototype for the customization part.

For tech:
We migrated from iPad to phone. For the body generation, we went back to the original mesh solution and let the monster grow up gradually. We also added some particle systems to make it more vivid. For customization, we changed the interaction from drag&drop to click. It performs much better than before.
Week 11 Feeding stage design and implementation
we finalized the experience flow of the feeding stage and started to test it in App.
For design:
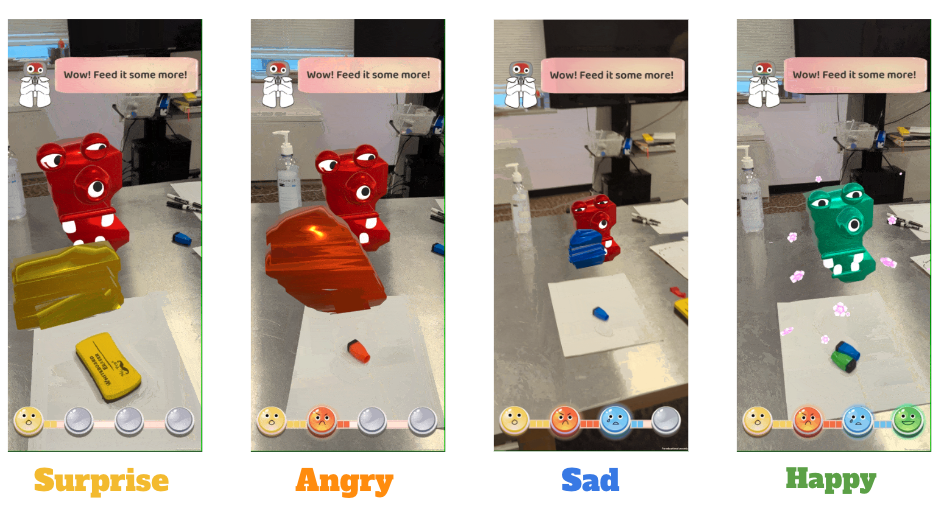
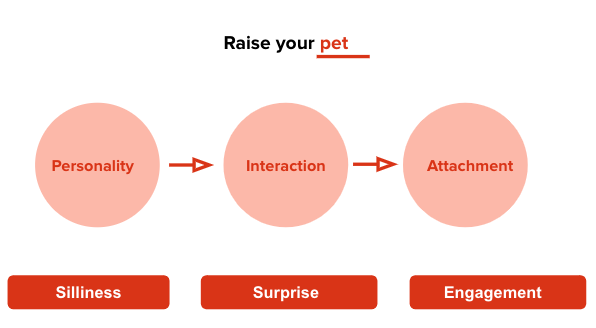
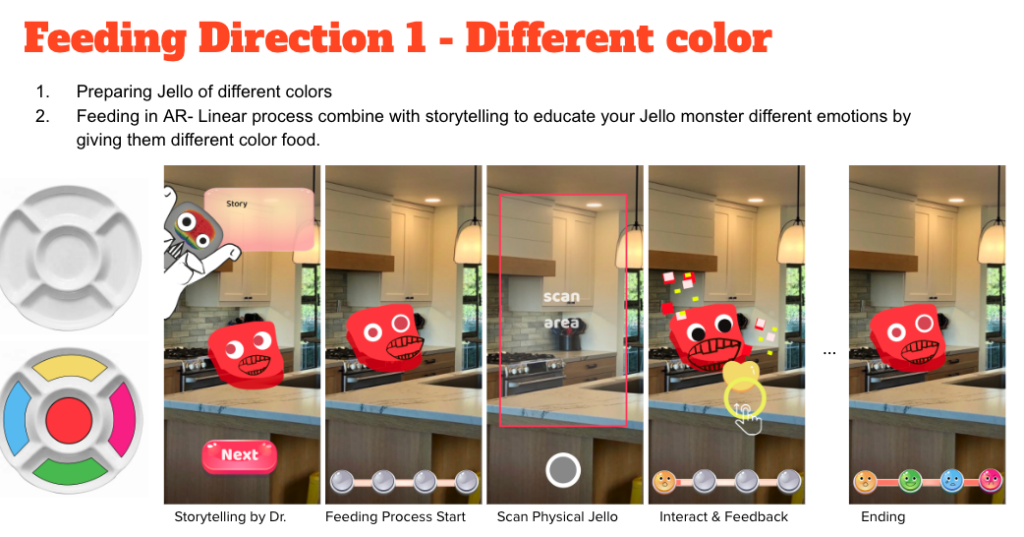
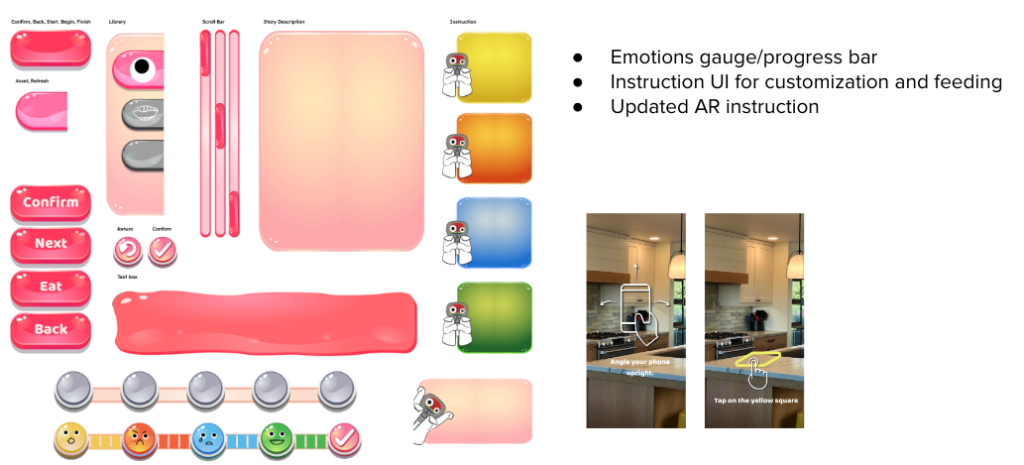
We brought out our design pillars which are: silliness, surprise, and engagement. On top of that, we designed the feeding flow and decided to use different colors’ jell-O to represent different emotions.
For tech:
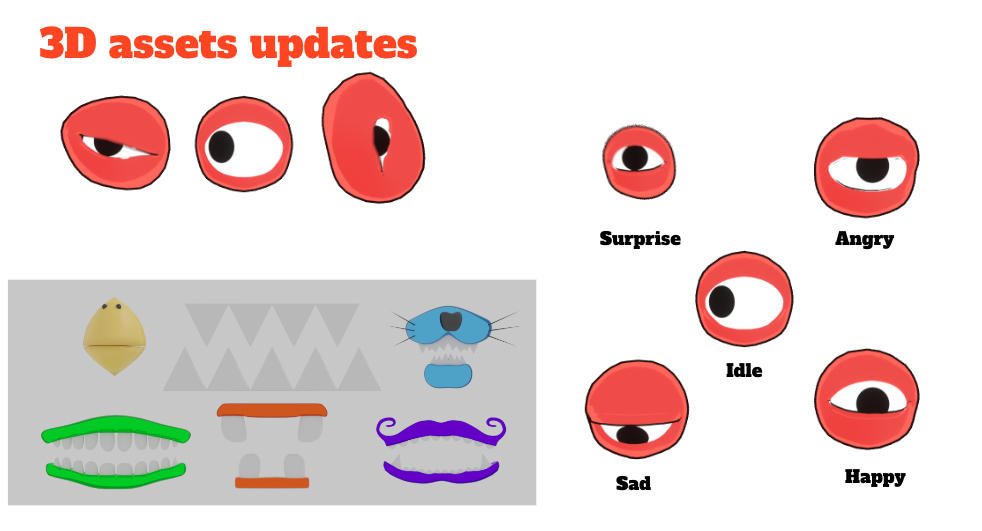
We realized the color recognition and updated the new 3D asset.

Week 12 Thanksgiving break
Week 13 Finished the implementation feeding stage
We implemented the whole experience of the feeding part and kept fixing the trivia before wrapping up.
For design:
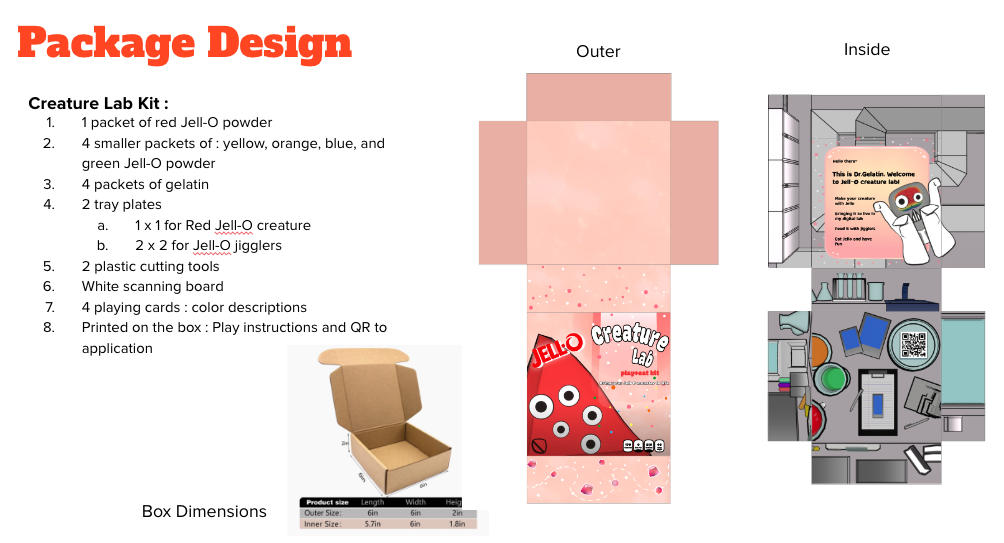
We updated our design system and finished the package design.
For tech:
We finished the feedback loop of 4 emotions and started to work on the ending part: take a photo and save it to the local album.